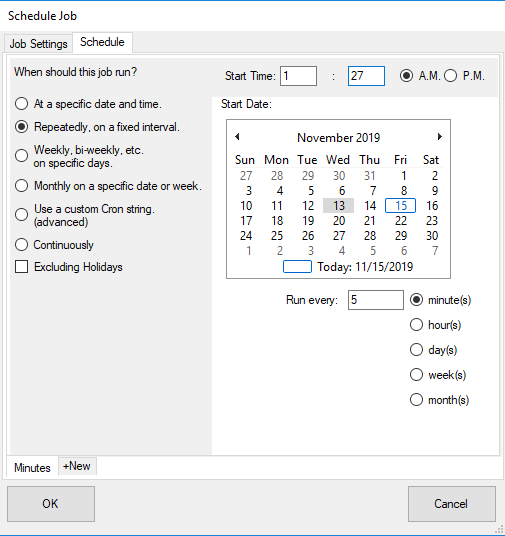
The "Schedule" tab in the Add/Edit job dialog is used to schedule a job to run at future times. There are several schedule types. They each have a start time and date that control when the schedule goes into effect. After that start time the schedule details control when it runs again. If the schedule will cause it to run in the future the time for that run will show in the Schedule column on the Job List on the Scheduler menu.
Adding a New Schedule to a Job
Each job can have multiple schedules. This allows for more precise scheduling that cannot be achieved through other means, such as setting up a job to run Monday-Friday once per hour (Schedule #1) but Saturday-Sunday only once per day at a set time. When setting up a job for the first time, no schedule is initially present. In order to schedule a job for the first time, you must first add a schedule.
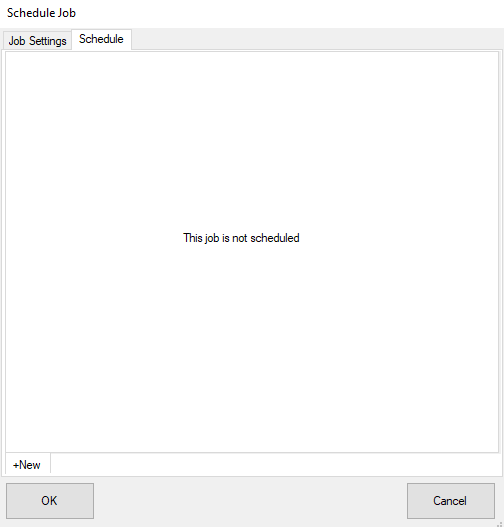
Click the "+New" tab at the bottom of the window to add a new schedule. By clicking "+New" multiple times, you can create multiple schedules for each job. To select between schedules during the configuration process, click the corresponding tab at the bottom of the screen.
Removing a Schedule from a Job
A schedule can be removed by right-clicking the target schedule from the tab list. Click "Delete Schedule" from the context menu to remove it.

Configuring a Schedule
If a job is scheduled to run but a previous run is still running that run will be blocked. Once the current run completes it will start again at its next scheduled run time.
Scheduling a Time in the Past
When a job is scheduled in the past (e.g., by selecting the current day and a time before the current time), the actual start day is advanced forward to the next applicable day. For example, if it is already Friday at 6 PM and a job is scheduled to run only on Weekdays starting from today's date at 5 AM, the job will in fact be scheduled to run next on Monday at 5 AM.
Holiday Tab
An optional "Excluding Holidays" checkbox, when checked, prevents the selected schedule from running on any user-defined holidays. The holidays themselves can be configured on the main Scheduler page, within the "Holidays" tab. The Excluding Holidays checkbox is an Enterprise-only feature.
Cron Expression Instructions
When the "Use a custom Cron string" radio button is selected, you must supply a Cron string that describes when your job should be run. Cron strings are made up of seven sub-expressions that describe individual details of the schedule. These sub-expression are separated with a space, and represent:
1.Seconds
2.Minutes
3.Hours
4.Day-of-Month
5.Month
6.Day-of-Week
7.Year (optional field)
An example of a complete cron-expression is the string "0 0 12 ? * WED" - which means "every Wednesday at 12:00:00 pm".
Individual sub-expressions can contain ranges and/or lists. For example, the day of week field in the previous (which reads "WED") example could be replaces with "MON-FRI", "MON, WED, FRI", or even "MON-WED,SAT".
Wild-cards (the '*' character) can be used to say "every" possible value of this field. Therefore the '*' character in the "Month" field of the previous example simply means "every month". A '*' in the Day-Of-Week field would obviously mean "every day of the week".
All of the fields have a set of valid values that can be specified. These values should be fairly obvious - such as the numbers 0 to 59 for seconds and minutes, and the values 0 to 23 for hours. Day-of-Month can be any value 0-31, but you need to be careful about how many days are in a given month! Months can be specified as values between 0 and 11, or by using the strings JAN, FEB, MAR, APR, MAY, JUN, JUL, AUG, SEP, OCT, NOV and DEC. Days-of-Week can be specified as vaules between 1 and 7 (1 = Sunday) or by using the strings SUN, MON, TUE, WED, THU, FRI and SAT.
The '/' character can be used to specify increments to values. For example, if you put '0/15' in the Minutes field, it means 'every 15 minutes, starting at minute zero'. If you used '3/20' in the Minutes field, it would mean 'every 20 minutes during the hour, starting at minute three' - or in other words it is the same as specifying '3,23,43' in the Minutes field.
The '?' character is allowed for the day-of-month and day-of-week fields. It is used to specify "no specific value". This is useful when you need to specify something in one of the two fields, but not the other. See the examples below (and CronTrigger API documentation) for clarification.
The 'L' character is allowed for the day-of-month and day-of-week fields. This character is short-hand for "last", but it has different meaning in each of the two fields. For example, the value "L" in the day-of-month field means "the last day of the month" - day 31 for January, day 28 for February on non-leap years. If used in the day-of-week field by itself, it simply means "7" or "SAT". But if used in the day-of-week field after another value, it means "the last xxx day of the month" - for example "6L" or "FRIL" both mean "the last friday of the month". When using the 'L' option, it is important not to specify lists, or ranges of values, as you'll get confusing results.
The 'W' is used to specify the weekday (Monday-Friday) nearest the given day. As an example, if you were to specify "15W" as the value for the day-of-month field, the meaning is: "the nearest weekday to the 15th of the month".
The '#' is used to specify "the nth" XXX weekday of the month. For example, the value of "6#3" or "FRI#3" in the day-of-week field means "the third Friday of the month".