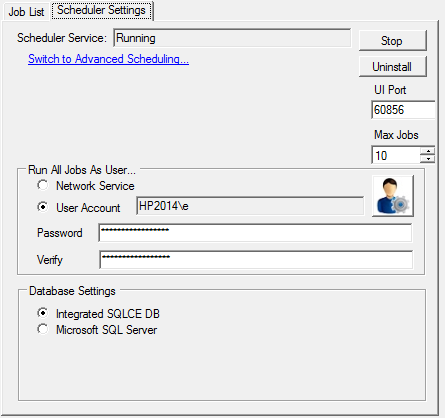
The scheduler settings tab with a non-default user properly configured
By default, the Scheduler runs all jobs as the Network Service user, but it is also possible to choose a different user instead. In order to run all jobs as a single user, you may wish to switch to "Simple Scheduling" mode for ease of configuration. Otherwise, if you need to run in "Advanced Settings" mode, refer to Running tasks as alternate users to learn how to set up job groups.
Under "Run Scheduler Service as User", click the "User Account" radio button. Because the scheduler service will need to be uninstalled to change users, some scheduler-related data may be lost. Therefore, you will be prompted to confirm that you wish to proceed. If so, click the "Yes" button in the resulting dialog box to proceed.
After confirming the change, an icon with an image of a user will appear immediately to the right of the "User Account" radio button, along with a password and password verification textbox below. Clicking the user icon button will open a standard Windows "Select User" dialog, from which you can select or manually type in the name of the appropriate user. After doing so, click the "OK" button to return to the "Scheduler Settings" tab.
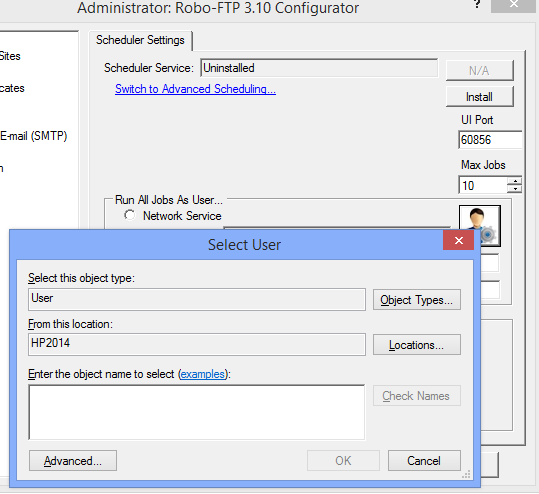
The scheduler settings tab with select user dialog
Back in the "Scheduler Settings" tab, in the "Password" textbox, enter the password for the chosen user. Re-enter it once again under the "Verify" textbox below. Finally, click the "Install" button at the top-right corner of the tab. This will reinstall and automatically start the service.